Don’t Have a Camera? Here’s the Best Way to Photograph the Northern Lights with Your iPhone.
This weekend, Northern California is experiencing a rare opportunity to witness the Northern Lights, and you don’t need professional camera equipment to capture this spectacular phenomenon.
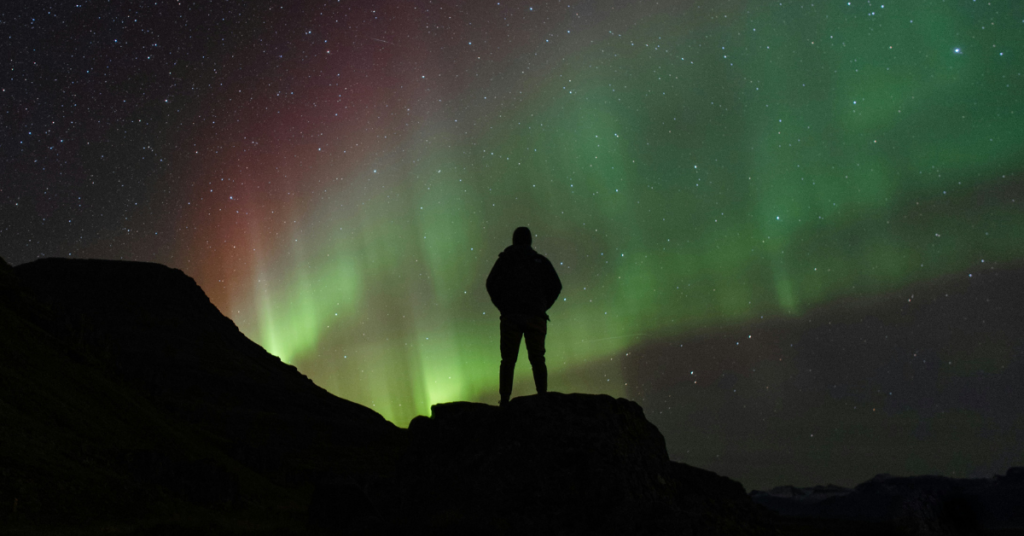
Triggered by heightened solar activity, this extraordinary display became visible Friday night far south of its usual geographic range, with photographs surfacing as far as Yosemite National Park in California. Residents who missed the initial display might still have the chance to witness the phenomenon, as the NOAA predicts that storming of varying intensity will persist through at least Sunday.
While the best photographers came out with some of the best NorCal photography we’ve seen in years, you can still capture this incredible event without expensive equipment. In fact, with a few tweaks to your smartphone settings, you can photograph the aurora borealis right from your phone.
1. Use Night Mode
Modern smartphones, particularly newer iPhone models from the 11 series onwards, come equipped with a Night Mode feature. This mode is specifically designed to enhance your camera’s low-light capabilities, allowing it to capture more detail and color in dark environments than the naked eye can see. Make sure Night Mode is activated in your camera settings before you start shooting.
2. Adjust Exposure Time
To capture the best possible images of the Northern Lights, you should adjust the exposure time on your smartphone. On an iPhone, you can do this by opening the camera app, tapping the arrow at the top of the screen to access hidden settings, and then selecting the Night Mode icon. Here, you’ll be able to increase the exposure time, ideally to the maximum setting. For the best results, an exposure time of about 30 seconds is recommended, but note that this usually requires the phone to be completely still, so a tripod might be necessary.
3. Stabilize Your Phone with a Tripod
Since long exposure shots require your camera to be stable, using a tripod can greatly improve the quality of your photos. This is particularly important when trying to capture something as subtle and dynamic as the Northern Lights. Invest in a sturdy tripod that can handle your smartphone and withstand outdoor nighttime conditions.
4. Location and Timing
Being further north improves your chances of seeing and capturing the aurora, but clear skies are crucial regardless of your location. Check the weather forecast and aim for a spot away from city lights with minimal cloud cover. The darker the environment, the better your chances of capturing the lights.
Even if you can’t see the aurora with the naked eye, your smartphone’s camera might still pick it up due to its sensitivity to different light spectrums. Take multiple shots to increase your chances of capturing a clear image of the Northern Lights. Remember, patience is key when photographing this elusive natural wonder!